| |
Installation Step One:
Unzip the archive in your Poser home directory.
The Poser "home directory" is simply where the file POSER.EXE lives.
This directory is probably called something like "C:\Program Files\Curious Labs\Poser 6"
or a similar name.
It might use "Metacreations"
instead of "Curious Labs" if
you have the Poser 4 Pro Pack. If it does, then you have probably been
using Poser long enough that you didn't really need me to explain this
to you anyway. :-)
|
|
|
|
| |
Installation Step Two:
Run the F3D Font Machine Python installation script.
You only need to do this step once. This installation script
makes sure that certain directories exist and it tries to set up the
F3D Font Machine so that it will be a button on your Python script
toolbar.
Run the installation script by selecting "Run Python Script" from the
"File" menu, then selecting "F3DFontMachineInstall.py".
|
|
|
|
| |
Installation Step Three:
After the installation script completes, you will need to either...
- reinitialize Poser Python by selecting "Reinitialize Python" from
the Poser "File" menu, or...
- just quit and restart the Poser program
entirely!
After you've done that you are ready to start generating some 3D text!
If you have any problems installing, contact us for help. See
"Troubleshooting" below for how to
contact technical support.
|
|
| |
 Tutorial Step One:
Now that you have successfully installed the F3D Font Machine, lets
begin and create some 3D text in Poser!
First you need to open up the Poser Python toolbar. You do this by
clicking on the "Window" menu in Poser and selecting the
"Python Scripts" menu item.
|
|
|
|
| |
Tutorial Step Two:
You start the Font Machine Python script using the Poser Python toolbar
that we just opened in Step One. First you click on the "F3D" button
and then you click on the "Font Machine" button.
That will bring up a window that looks like the one to the right...
|
|
|
|
| |
Tutorial Step Three:
In the Font Machine dialog box, type in some text and then click on the
checkboxes to change how the letters are parented.
The checkboxes are described over to the right... ======>>
|
|
|
What the Checkboxes Do:
Use cascading parents
(default checked) -
Each new letter has the previous one as its parent. This means that if
you click on a letter in the middle of a sentence and then drag or
resize it, ALL of the letters following that one are affected.
Place text on a backdrop
(default clear) -
Text will be placed on and parented to a rectangular prop, making it easy
to manipulate the text.
Use master control point
(default clear) -
A master control point is a small invisible control prop. It becomes
the parent for the entire text string.
Combining Options If more than one
checkbox is checked, the options are combined. For example, the master
control prop becomes the parent of the first letter when "cascading
parents" is checked and the master control prop is parented to
the backdrop rectangle when "place text on backdrop" is checked.
|
|
| |
Tutorial Step Four:
Finally, when you click on the "Go" button, the Font Machine starts to
load one Poser prop for each visible letter in the input string. The
Font Machine uses the "032space" prop to put space between words but it
does not actually create a "space" prop in Poser.
[note: technically, the Font Machine loads the space character prop once
in order to tell how wide a space is for the current font, but, after
it has that information, it discards the prop and just scoots the other
characters over whenever it needs to generate a space.]
|
|
|
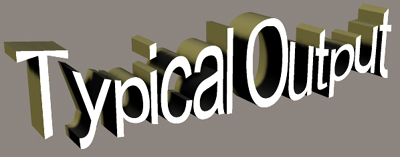
Below is a picture showing typical output from the F3D Font Machine.
The characters were produced in the manner described above and then
the first character, the letter 'T', had a "Wave Deformer" attached to
it. All of the remaining characters were added to the deformer.
The deformer zone was then resized so that it would affect all of the
characters equally.
|
|
| |
Troubleshooting:
If you are having problems with this package and you've read the
documentation but still can't get something to work, we want to hear
from you.
First please visit http://www.fantasy3d.com/support for more information
on how to install and use the Fantasy3D Font Machine. There are answers
to how to solve most problems. If that fails to work, please send an
e-mail to support@fantasy3d.com.
In your email, describe the problem to us very clearly and in great
detail. Tell us what is wrong and what you have already tried.
Best of all, tell us how to reproduce the problem you are seeing. Be
sure to include the order number from your purchase invoice. If you
don't have that, don't worry, just tell us what e-mail address you used
when you purchased this product and we can look the information up that
way.
But no matter what, we do want to hear from you so we can take steps to
make the next version of the Fantasy3D Font Machine a better product.
|
|
| |